Many network experts may have come across the Network Giant Cisco’s way of configuring protocols but today, I will like to show how to Configure NAT the VyOS way. VyOS is used by many professionals in labs to interconnect subnets with the ability to route traffic to the Internet.
Devices connected to the Local Network need an IPV4 address in order to communicate to devices internally and externally. Devices here include access to Servers, Web Applications and what have you. In order to keep the communication going, there has to be a way for your local IP Addresses communicate over the Internet. There is a lot to say about RFC 1918 – NAT but I will simply like to demystify the concept so you can get your LAN devices to speak to the Internet.
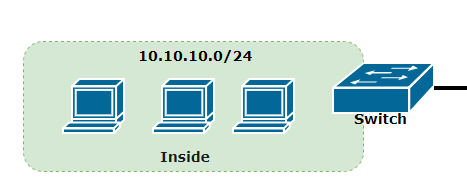
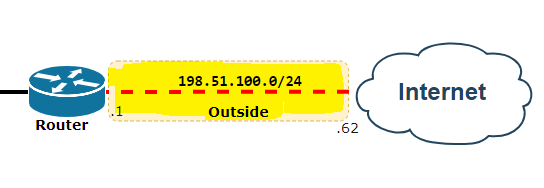
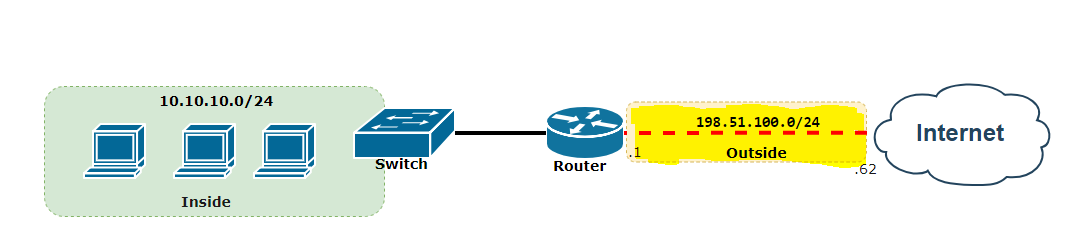
In figure 1.1, You can clearly see the 10.10.10.0/24 Network with devices ready to speak with the internet. There is a a VyOS Router which faces the Internet Service Provider’s Router (WAN Side).
Let us now jump in to configure NAT on a Vyos Router.
LAN Side – LAN: 10.10.10.0/24
WAN Side – WAN: 198.51.100.0/24
So the definition of NAT is the translation of the LAN Addresses (Private IP Address Assignment) to a Routable Public facing IP Addresses for the purposes of communication over the Internet.
With this simplified definition, one must remember that NAT only comes to play when devices have the need to speak over the Internet. VyOS Router (Virtual Appliances) have the capability of handling NAT between our Trusted LAN and the Untrusted WAN Networks.
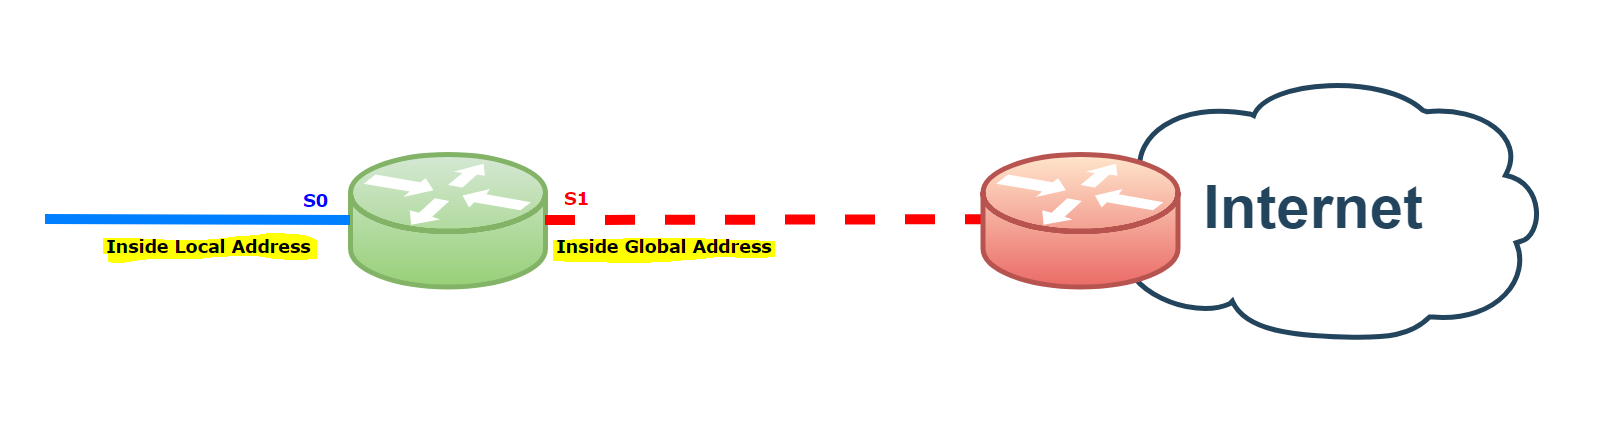
- Inside local address– Usually not an IP address assigned by a service provider and is most likely a private address.
- Inside global address– Valid Public IP address that the inside host is given when it exits the NAT configured router.
- Outside global address– Valid public IP address assigned to a host on the Internet.
- Outside local address– The local IP address assigned to a host on the outside network.

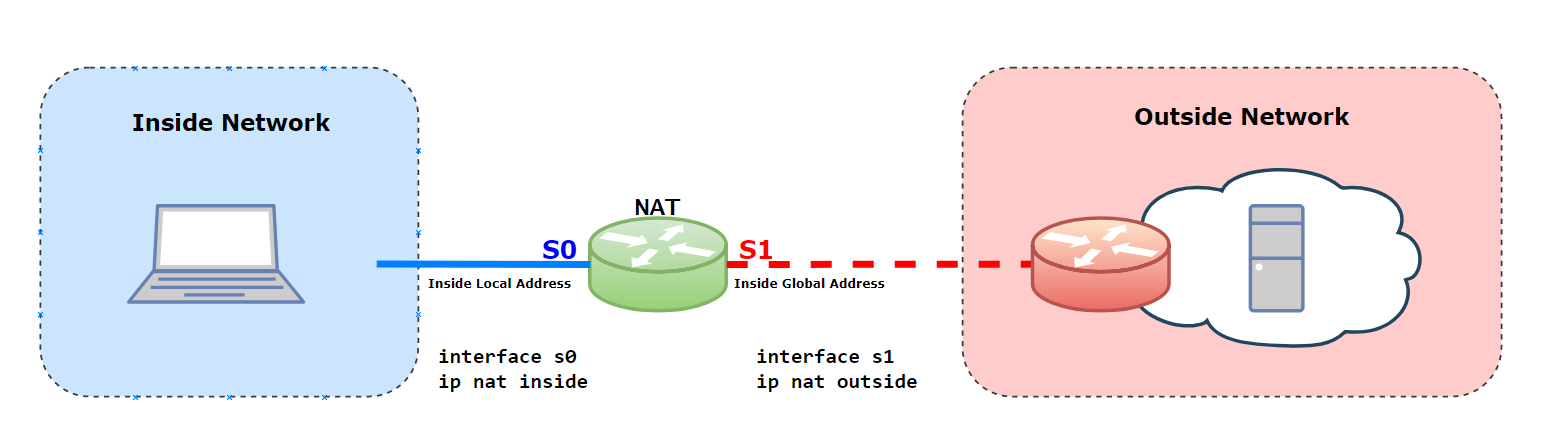
Configure the Inside Local and Inside Global Interfaces which will handle where the traffic sources and exits the Network.
!Inside Local Address
!
NAT(config)#
interface Serial0
 ip address 10.10.10.1 255.255.255.0
 ip nat inside
end


!Inside Global Address
!
NAT(config)#
interface Serial1
 ip address dhcp
 ip nat outside
end
Create Access List to Permit the 10.10.10.0 Network
NAT(config)#
access-list 7 permit 10.10.10.0 0.0.0.255
Create Network Address Translation to allow the 10.10.10.0 Inside Network to the Internet
ip nat inside source list 7 interface Serial1 overload
Verify Network Address Translations
Router#show ip nat translations

Pro     Inside global      Inside local       Outside local      Outside global
---     198.51.100.1        10.10.10.60            —                 ---
Figure 1.2
vyos@vyos:~$ show configuration commands

set interfaces ethernet eth0 address '10.10.10.60/24'
set interfaces ethernet eth1 address '198.51.100.1/30'


set nat source rule 1 outbound-interface 'eth1'
set nat source rule 1 source address '10.10.10.0/24'
set nat source rule 1 translation address 'masquerade'

set system gateway-address '198.51.100.2'

set service ssh port '22'
set system config-management commit-revisions '100'
set system 'console'
Hope this article has helped you understand very quickly how to configure NAT on Cisco iOS and VyOS and remains a reference material when needed?
- Follow this guide to setup the Cisco 800 Series Router for your home or business Internet.
- Follow the Cisco NAT Configuration Reference Guide for more NAT scenarios.
Follow the link if you would like to know How to Connect GNS3 to Internet